
Bringing the Nail Salon Into Your House
The nail salon experience was something every young fashionista used to crave. Getting pampered and beautified was a luxury our younger society longed for. Now, the economy has stripped us of our dreams of grandiose and forced reality upon our bank accounts. That sad reality is, going to a nail salon just isn’t affordable anymore. However, in place of our lost ritual, a new one has taken its place. And from the ashes rises the culture of press-on nails.
The market is booming with all sorts of DIY nails. From press-ons to at-home builder gel polish, with a few tools and lots of TikTok tutorials, one can become a nail tech from the comfort of their own couch.
Press on Nails

Source: Bryony Elena on Unsplash
The art to press on the nail lies strictly on the nail glue. If you don’t have good glue, then you’re not gonna have a good do. After scouring the webs and watching many online review videos, these seem to be the big three in terms of nail glue.
1. Beauty Secrets Drip & Clog Proof Nail Glue
2. Glamnetic Super Strong Brush On Nail Glue
3. KISS PowerFlex Maximum Speed Nail Glue
The glue isn’t the only important part of the process. The prep will make your nails last longer than your last situationship.
There are three important steps to every good prep.
Step 1: File.
Not only do you want to shape your nails, but filing down the top of the nail with a fine-grit file (known as buffing) will help the press-on stick better.
Step 2: Cuticles.
Pushing back your cuticles is key to making that DIY nail job look professional. Bonus points if you go the extra mile to use cuticle remover.
Step 3: Dehydrate.
This is as simple as wiping an alcohol pad across your nails. It soaks up all the oils, which will make the nail glue bond better to your nail. It also helps remove any dust that might remain after the previous two steps.
Although these steps might be tedious, it is necessary if you want nails that will look and last great.
Now it’s time to apply the press-on. Picking a design can be challenging, especially because there are so many opinions. To narrow down the selection, here are three brands that stand out among the leagues.
Olive & June
From minimalist to maximalist, this brand has the cutest designs for all aesthetics. These nails are available on their website and are also sold in many store chains, including CVS, Target, and many others. They are affordable, but don’t skimp out on quality.
Kiss
This is one of the most popular nail brands for a reason. This brand has a large variety of designs, shapes, and colors. They also have 3D design options and lots of elevated designs. If you’re looking for something that will make a statement, chances are there’s something here for you.
Kijibae
This nail brand is very unique, not only in its designs but it’s application. These nails come in sticker-like gel strips that you peel onto your nail and can trim accordingly. Once you have the desired shape and placement, the strips need to be cured under a UV lamp, and you’re left with a durable, glossy finish comparable to a normal press-on nail.
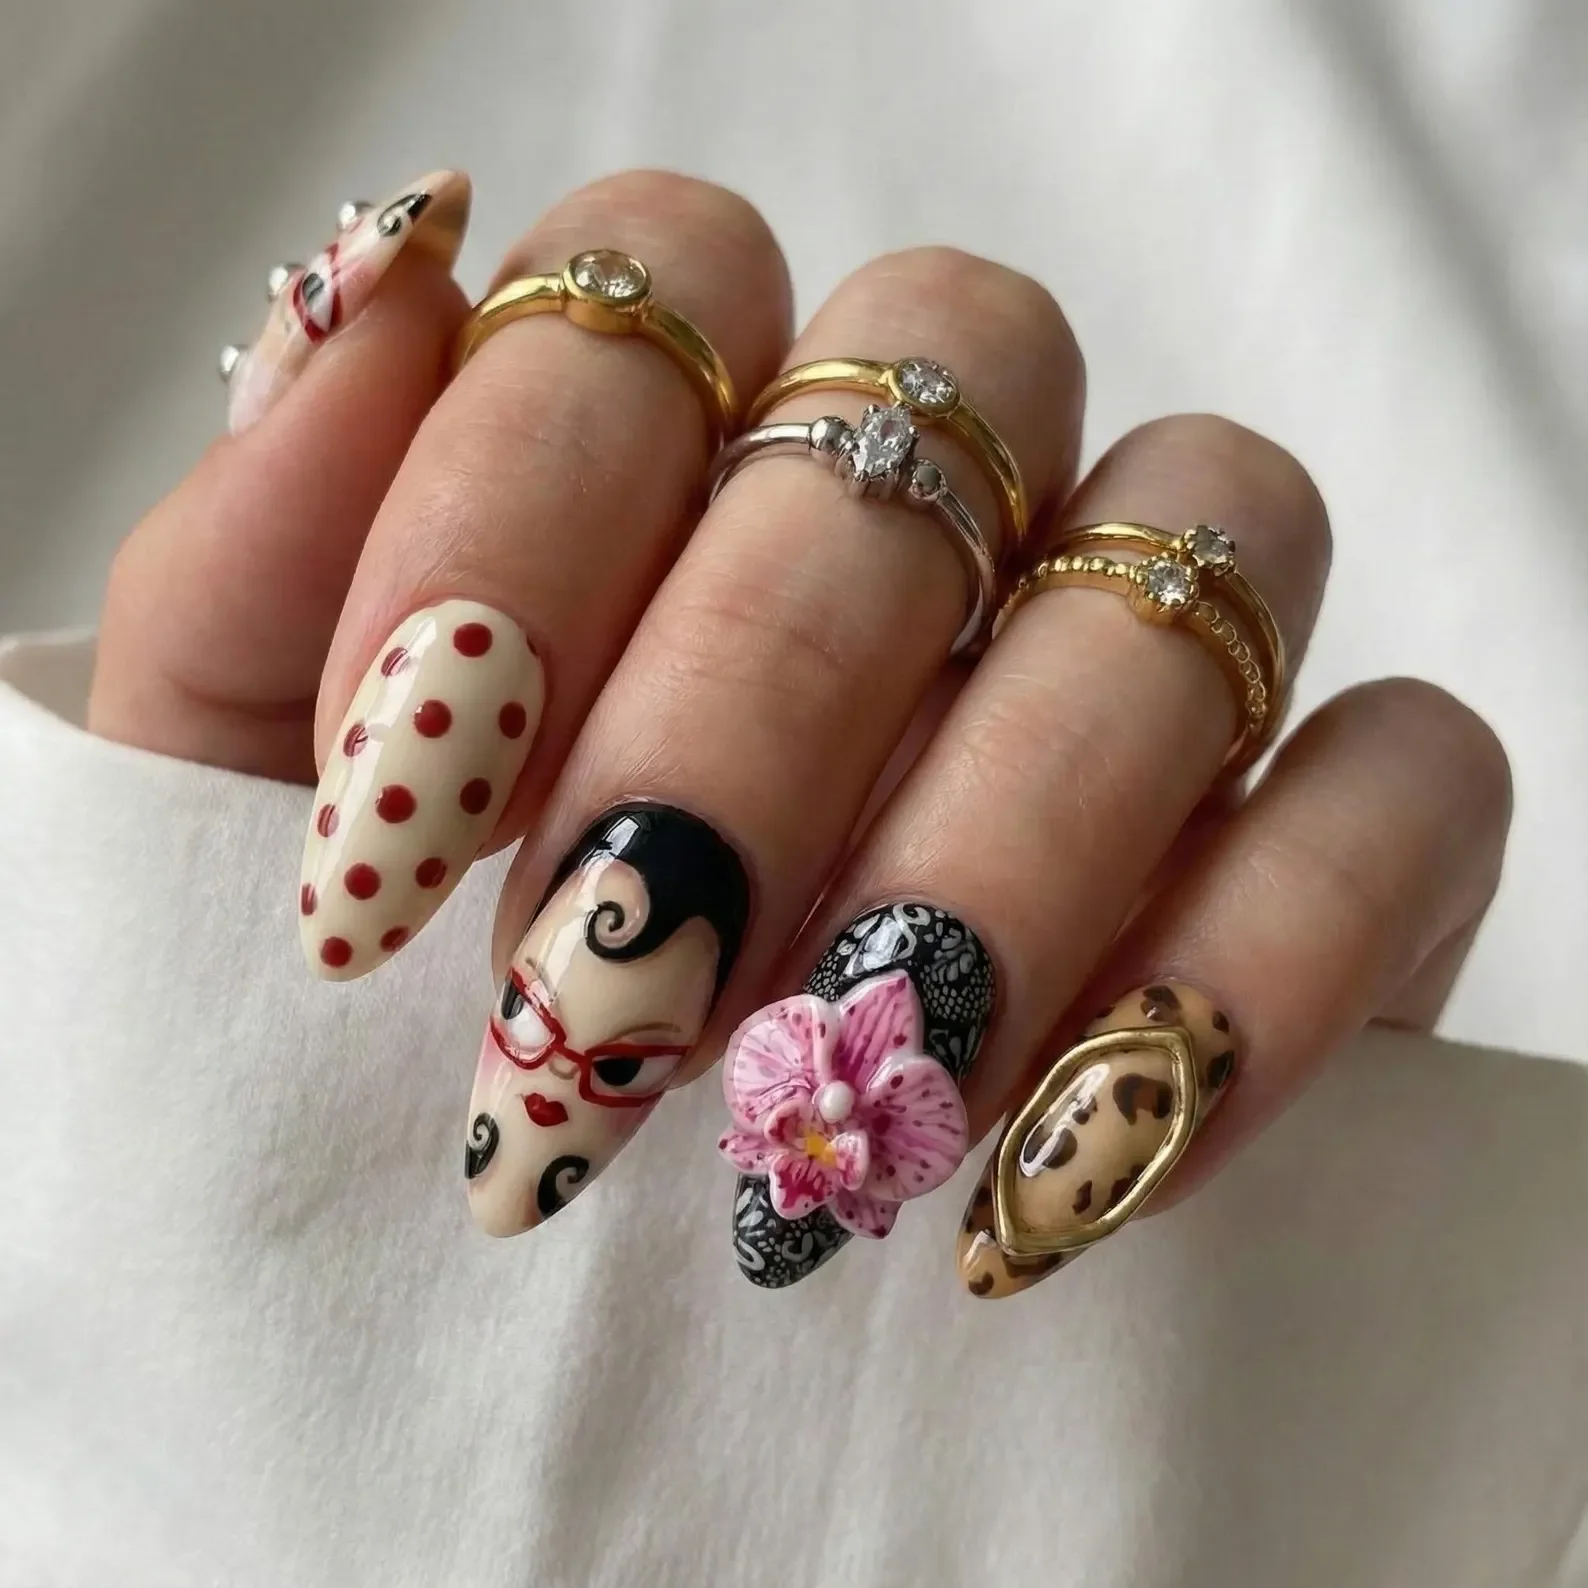
Source: SevenNailArt on Etsy
Homemade nails are also very popular and are often more intricate and unique in their designs. Looking on Etsy or other online selling platforms for more specific designs can be a great way to make your nails a little more special and personalized. It is common to see homemade nails incorporate 3D elements like jewels, pearls, or mini sculptures, which add an extra bling.
Builder Gel Polish
If press-ons aren’t your thing, that’s cool! Gel polish is a lot simpler to do than you think. A builder-gel starter kit consists of a base coat polish, builder gel polish, a UV/LED lamp, and a top coat polish. Meticulous prep is also important for a good result, which would include buffing, dehydrating, and cuticle trimming. It is also common to buy nail extensions to add to the end of your nails when doing gel polish.
There are two different types of gel polish. The first is liquid builder gel. This comes in a bottle similar to a normal polish. It is the most common type for beginner or at-home manicures. The polish is almost identical to a normal liquid nail polish (and comes in a wide variety of colors), except that when placed under a UV/LED light, it cures into a harder and longer-lasting polish.
Solid builder gel takes more of a technique to apply, but holds the same curing principle. After placing a small bead of the putty-like gel, the applicant must spread the gel evenly across the nail. Unlike liquid gel, it is usually a light-pink/nude color, which is then painted over by a liquid polish. Solid gel is mainly used for building up or extending the natural nail, but, as said before, it is not often seen in the DIY nail scene. Solid gel can also be used for sculpting shapes on top of a nail for a 3D design or attaching pre-made gems.
Hopefully, these tips and tricks can get you started on your nail art journey.
Do you prefer press-on nails or builder gel polish? Leave a comment below!